



What Is a Dieline? A Packaging Guide for Brands and Designers

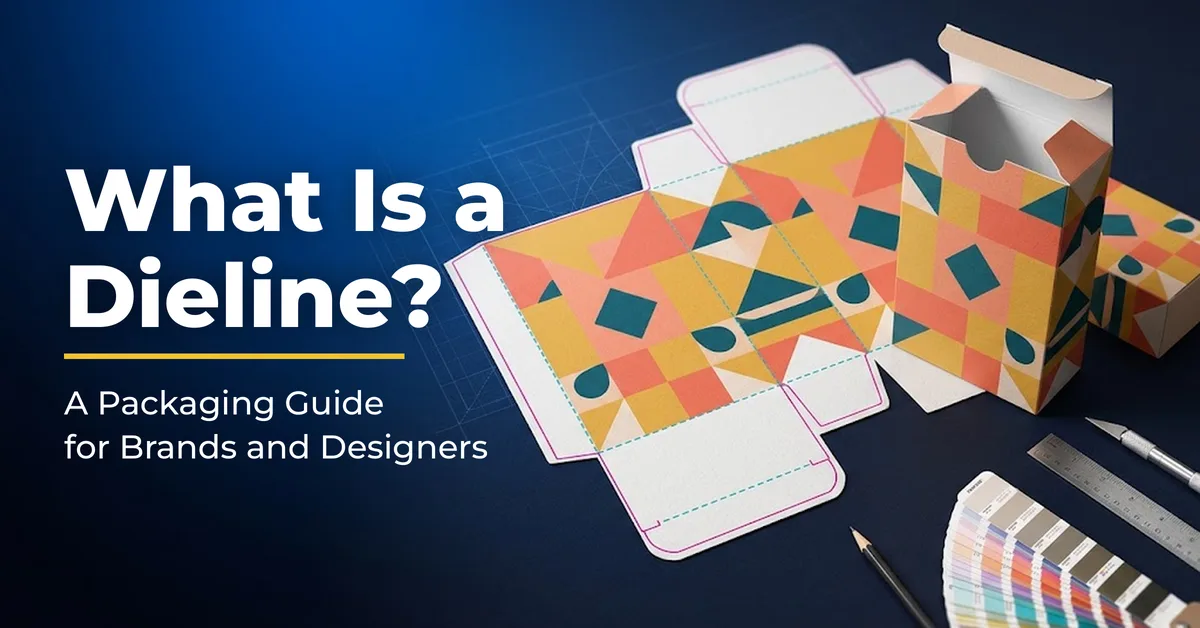
A dieline is a flat, to-scale outline of an unfolded box. It shows where the board is cut, where it folds, where the maker glues it, and where your artwork can go. If a supplier just asked you for one, treat it as the blueprint every other step in the order depends on.
What Is a Dieline in Packaging?
The question “what is a dieline used for?” has a short answer in practice. It is one drawing that three groups read for different jobs. The designer places artwork on it, so the logo and colors land on the right panels. The printer checks that the artwork lines up with the structure.
Production then uses it to make the cutting die, and to cut, crease and fold the printed sheet into a box. That is the packaging dieline meaning in one line: a drawing that links design to manufacturing.
What is a dieline not? It is not a picture of the finished box. A 3D mockup shows how the built box will look, while the dieline shows the flat parts it is made from. You normally need both before you approve a print run.
What Do the Lines on a Dieline Mean?
Every line on a dieline carries an instruction. Suppliers draw them in different colors and styles, so the legend that comes with your template always wins over any general guide.
Colors such as black for cuts, red for folds and green for bleed and safe margin appear in some vendor guides, but they are a habit, not a rule, so follow the legend on your supplier template. The table shows how to treat each line.
| Line type | What it tells the printer | What to do with artwork |
|---|---|---|
| Cut line | The outer edge where the die cuts through the board | Never let important content touch it |
| Fold or crease line | Where the board bends to form an edge | Keep text and logos from crossing it |
| Perforation line | A row of small cuts for a tear-off section | Keep it clear of key content and give it its own layer |
| Bleed line | How far the background must extend past the cut | Extend colors and images to this line |
| Safe margin | The inner zone where content stays protected | Keep text, logos and codes inside it |
| Glue tab | The strip that joins the sides of the box | Keep it free of artwork that must stay visible |
Cut Lines
The cut line is the outline of the whole shape. It also marks any internal cut-outs, such as a window or a thumb notch. The die follows this line, and small shifts in the sheet during cutting are normal, which is exactly why bleed and safe margin exist.
Fold and Crease Lines
Fold lines mark where the board gets a score so it bends cleanly. A fold is a mechanical line, not a design element, so a headline or a logo that crosses it will look broken on the finished box. Plan the layout so each panel carries its own content.
Perforation and Glue Tab
Perforation appears when a part of the pack has to tear away, such as a strip that opens a carton. The glue tab is the narrow flap that joins the sides when you assemble the box. Both need space around them, so keep barcodes and legal text away from either one.
Bleed and Safe Margin
Bleed is extra artwork that runs past the cut line, so a thin white edge does not appear if the cut shifts slightly. The safe margin is the opposite: an inner border where text and logos stay protected. Bleed protects the background, and the safe margin protects the message.
How Much Bleed and Safe Margin Do You Need?
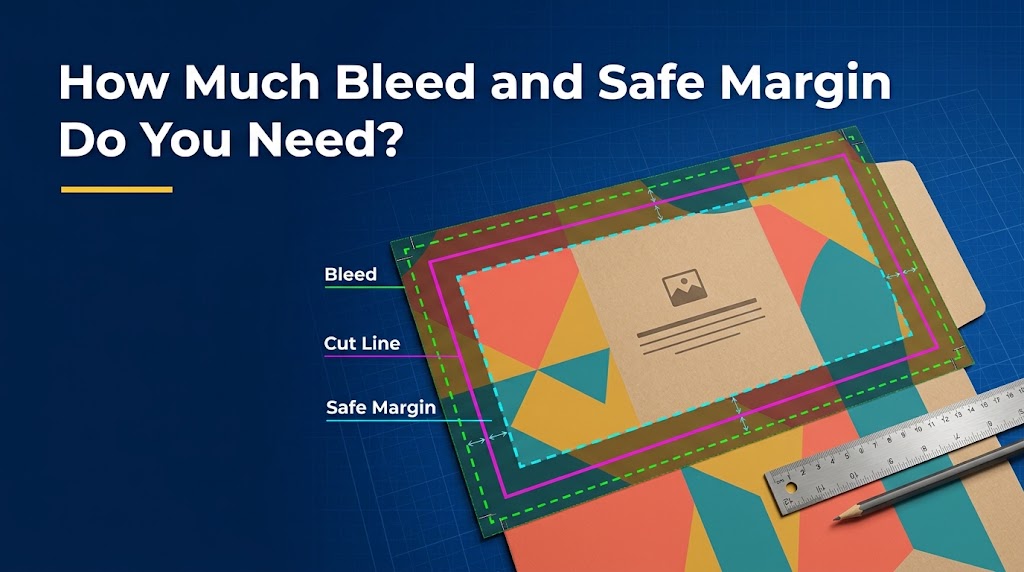
There is no single number. Vendor guides commonly suggest a bleed of 3 mm (0.125 in), yet some printers ask for 5 mm and others as little as 2 mm. Safe distances from the cut and fold lines in published guides range from about 1.5 mm to 8 mm.
That spread is the useful finding. Bleed and safe values depend on the printer’s equipment and process, not on the design software. So use the values on the template you receive for your exact box, and treat any number you read online, including these, as an example that varies.
How Do You Read a Dieline for Your Box Style?
Once you know the line types, the layout is easy to decode. What is a dieline for a tuck end box compared with a rigid box? The same set of lines forms a different pattern for each structure, so learn to spot the panels, flaps and tabs and you will see where your artwork has to go.
- Tuck end box. A row of four side panels, a glue tab on one edge, and a tuck flap with a dust flap at each end. A straight tuck end opens on one side of the carton. A reverse tuck end flips one flap so the opening sits on the opposite face, which is why the two dielines look different at the same box size. Our guide to how a tuck box is built walks through the structure.
- Sleeve and tray. Two separate dielines: a sleeve that wraps around and a tray that slides inside. Each needs its own artwork file and its own proof.
- Auto-bottom carton. The bottom panels lock when the box is opened, so the dieline shows overlapping bottom flaps that need clear space.
- Rigid box. Rigid boxes use wrapped board, so the dieline describes the wrap paper and its turn-ins rather than a cut-and-fold sheet. A sliding drawer box is a good example of a structure with a separate tray and sleeve.
A Folding Carton Example
For a folding carton example, see our custom lotion boxes, which come in tuck end and sleeve styles. In both, the dieline is the place to check that the front panel is the one customers will see on the shelf.
If you sell skincare or similar items, our cosmetic and personal care packaging range shows more structures that start from a dieline.
How Do You Get or Make a Box Dieline Template?
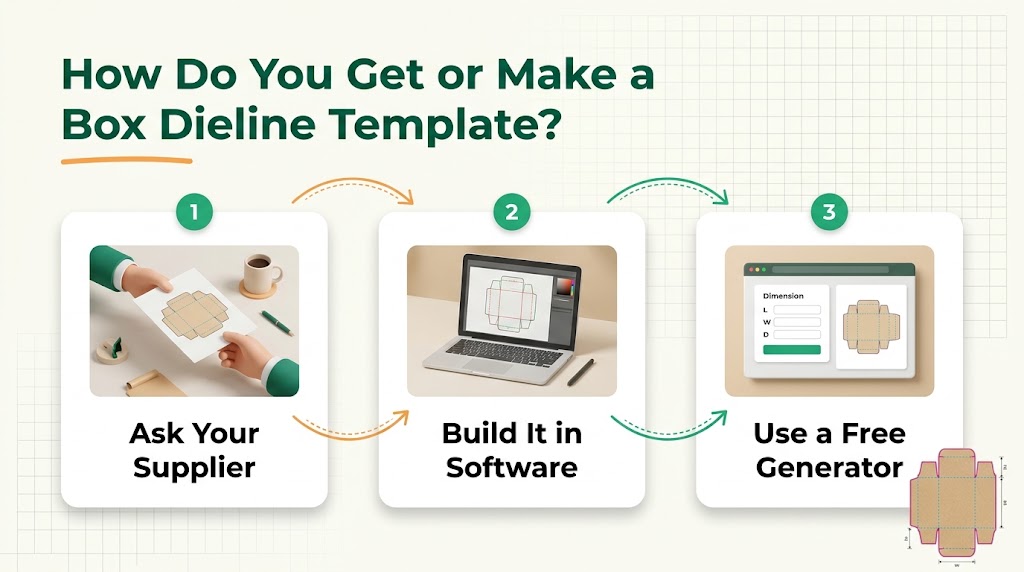
There are three practical paths, and the first one saves the most time.
- Ask your packaging supplier for a template. Give them your box style and inside size and ask for the template for that exact structure. A supplier template already carries the right line types, bleed and safe margin for their equipment, so you are not guessing.
- Build it in structural software. Packaging engineers use programs such as ArtiosCAD to draw the structure, and designers then place artwork in an illustration program such as Adobe Illustrator. This route suits teams with a custom structure that does not match a standard style.
- Use a free online template generator. Several tools produce a basic dieline from your dimensions. They are useful for a first idea, but check the result with your printer before you finalize artwork.
Measure the Packed Product First
If you are wondering how to make a box template yourself, the step that matters most comes before any drawing: measuring the product. A dieline only helps if the box fits the product, so measure the packed item, not the bare product, in length, width and height.
Add headroom for anything that sits above it, such as a pump or a cap, and a small tolerance so the product slides in without forcing. Our guide to measuring length, width and height for a box explains the order of the three numbers.
Why a Dieline Belongs to One Size
A dieline belongs to one structure and one set of inside dimensions. If you change the bottle, add an insert or switch to a taller product, the dieline changes and so does the proof.
Reusing an old template for a new product often leads to a box that does not fit, and each size needs its own dieline. When you need a box dieline template for a new size, request a fresh one instead of resizing the old file by eye.
How Do You Set Up Artwork on a Dieline?
Once you have the right template, a few habits keep the file clean for the printer. Work through this checklist before you send anything:
- Use vector files. A vector PDF or AI file keeps lines and text sharp at any size. Confirm the accepted formats with your supplier before you export.
- Set the color mode to CMYK. Name any spot colors clearly, such as a Pantone (PMS) color, so the printer knows which ones you mean.
- Keep the dieline on its own layer. Do not delete it, and do not merge it with the artwork. The printer needs it to check alignment.
- Draw mechanical lines as hairlines with no fill. A filled shape or a thick stroke can read as artwork, and it may print.
- Extend backgrounds past the bleed line. Colors, patterns and photos that touch an edge must run to the bleed.
- Keep text and logos inside the safe margin. This holds for small type as well as headlines.
- Move barcodes and legal panels away from folds and glue tabs. A code that crosses a crease may not scan.
- Outline fonts or embed them. Otherwise a missing font can change your layout.
- Check each panel orientation. Text on the top, bottom and side panels should read the right way when the box is built.
Use the same list as a proof pre-flight. When the digital proof comes back, go through it line by line instead of only glancing at the front panel.
What Happens After You Send the Dieline?
New buyers sometimes ask why the file matters if the supplier handles production anyway. Anyone asking “what is a dieline good for?” gets the same answer: control. A correct file is what makes the first proof right.
With ZK Print Solutions, the path after the dieline is clear once artwork and structure agree. You receive a digital proof before anything prints, along with a free 3D mockup that shows how the built box will look.
Proof and Revisions
You get unlimited revisions, so you can fix a misplaced logo or a wrong panel before production. PMS color matching is available when your brand color has to match exactly.
In general practice, after approval a cutting die is made for the structure and the sheets are printed, cut and creased. If the box has a tight fit or a new structure, a paid sample lets you hold a real box before the full run.
There is no minimum order, so a small first run is possible. Turnaround is 4 to 8 business days, delivery time included, rush available.
FAQs
If you only keep one answer to “what is a dieline?”, keep this one: it is the flat map that ties your artwork to one specific box. The questions below cover the details buyers ask most.
Does the dieline change with the product size?
Yes. The dieline is drawn for one structure and one inside size. A larger bottle, a thicker insert or a taller item changes the panel sizes, so it needs a new dieline and a new proof.
Is a dieline the same as a mockup?
No. A dieline is the flat plan of cuts, folds and artwork limits. A mockup shows the built box with your artwork on it. The dieline comes first, and the mockup is how you check it.
Can I use one dieline for two products?
Only if both products fit the same inside dimensions and the same structure. Even then, artwork may need adjusting, so each product should get its own proof.
What if my artwork crosses a fold?
A design that crosses a fold can look broken or misaligned once the box is built. Keep key elements on a single panel, or plan a continuous background that is meant to wrap, and check it on the 3D mockup.
Do I need a different dieline for each box style?
Yes. A tuck end carton, a sleeve and a rigid drawer box have different panels, flaps and tabs. Choose the style first, then use the template that belongs to it.
Now that you know how a dieline works and how to prepare one, put it to work: Get a Free Quote with your box style and inside size, and our team will confirm the details with you. You can also call +1 346-350-1186 or email magnuswolfson@zkprintsolutions.com.